Linear Speedlines
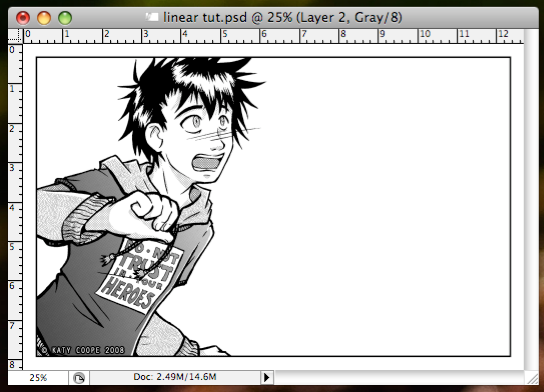
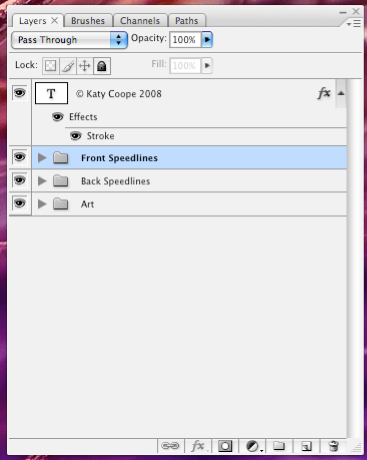
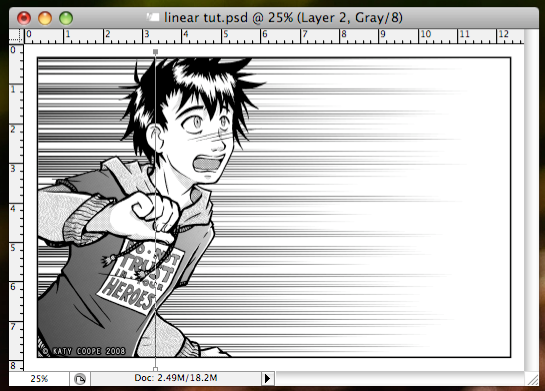
1) The first thing we need is an image. Something inked, black and white or screentoned will work best. For this one I've drawn a quick shot of a guy reacting to something off panel. If you've not flattened it, put all the layers you've used to make the image so far into a group, to make it easier to see what you're doing.
Note: These techniques work best on images smaller than 2000x2000, though that's not a hard and fast rule.
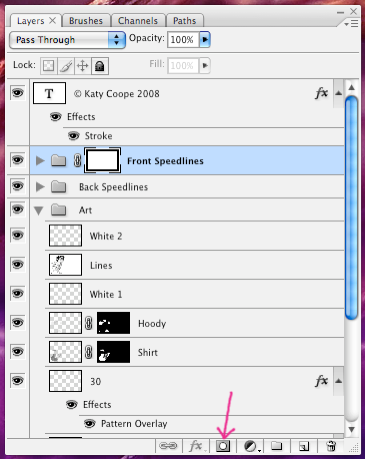
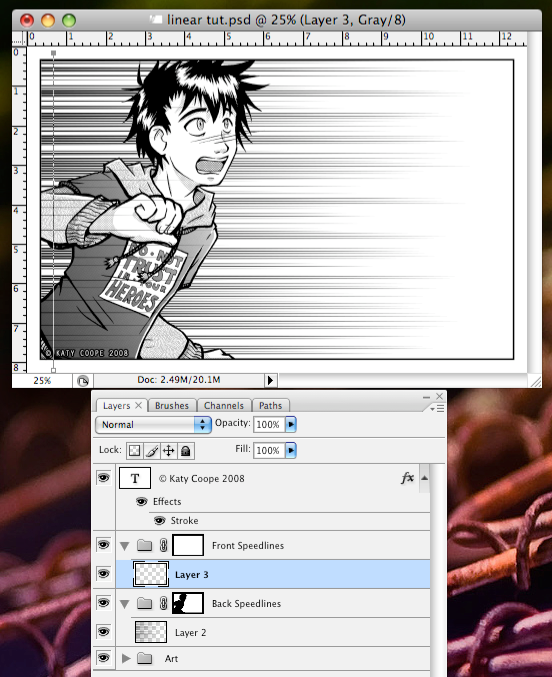
2) Before we make our speedlines, we need to mask out the areas we want them to appear in. We're going to want two main masks: a foreground and a background. To make this easier, create a new group for each on the layer pallet.
3) The easiest way to create the masks is to select the areas you want the speedlines to appear in, select the layer group and then click the 'add layer mask' button (pointed out on the screenshot). This will make a little thumbnail of the mask appear, which can also be edited with the painting tools.
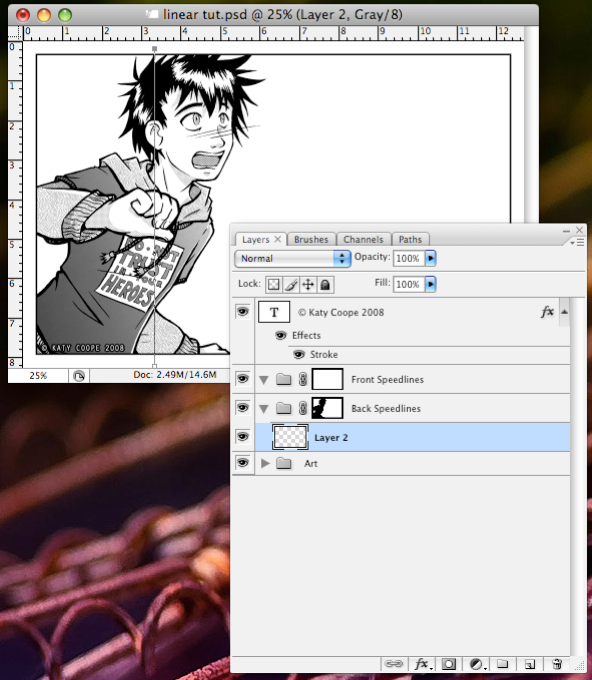
Note: If you have any dialogue in your panel, you don't want your speedlines to cover it. Use your masks to protect dialogue that is part of the artwork. Where it has been added separately, just put your dialogue layers above the speedline layer groups.
4) Once you have your masks set up, it's time to use your brush. Create a layer in your background speedline group. Select the pen tool, and make a straight path. This should be 90 degrees anti-clockwise from the direction you want your speedlines to be going. Here I wanted them pointing left to right, so I made a path going from the bottom to the top of the panel.
5) This is where some trail and error comes in, as the next few steps will vary depending on your image. Switch to the brush tool, pick one of your speedline brushes and adjust the master diameter to the length you want the longest speedlines to be. Then, making sure you still have the path selected, hit the enter to stroke the path. I tend to prefer thinner brushes, but it will depend on the size of your image. If the speedlines are too thick or too long, adjust their size in the brush tip shape pane and try again. If you see any 'blunt' ends appearing, drag the path back towards the edge of the panel.

6) Our speedlines are still looking a bit sparse, so lets add some more. Adjusting the spacing and size if you like, stroke the path a few more times. The lines can be made thinner by dragging the path back towards the edge of the panel. You can either keep building the speedlines up on the same layer, or make a new layer for each stroke to give yourself a little more control.
7) Make a new layer in your foreground speedline group. Drag the path back a little and then stroke it a couple of times to put some speedlines in front of the character.
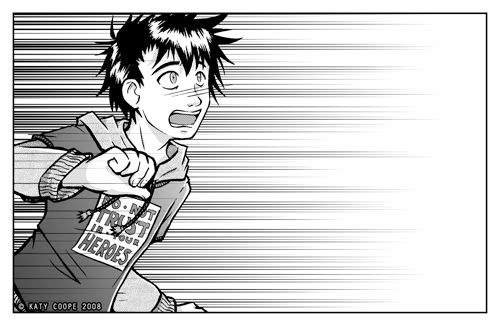
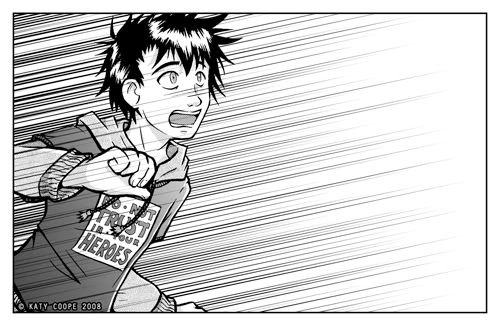
8) And there you have your linear speedlines. If they don't give you quite the effect you want, try experimenting with angles. Generally, diagonal lines will look more unstable or uncomfortable than lines that follow the shape of your panel— which can be just what you need for a particular moment. For example, this image looks more dramatic if the lines follow that character's gaze rather than the edges of the panel:
Radial Speedlines
Radial speedlines are often used to highlight a particularly dramatic moment, although you can also use this technique to suggest movement towards or away from the 'camera'. They can be created in much the same way as we made our linear speedlines, the key difference being we use a circular path instead of a straight one.
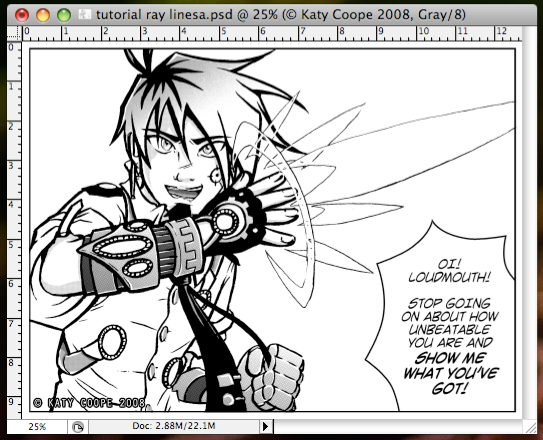
1) Here's my starting image, of my character Ray calling out a bad guy. Set up your masks and groups like before.
Note: You can use larger images for this than you could with the linear speedlines. However, as there is a limit to the brush spacing allowed, using too large an image can lead to unnaturally regular speedlines.
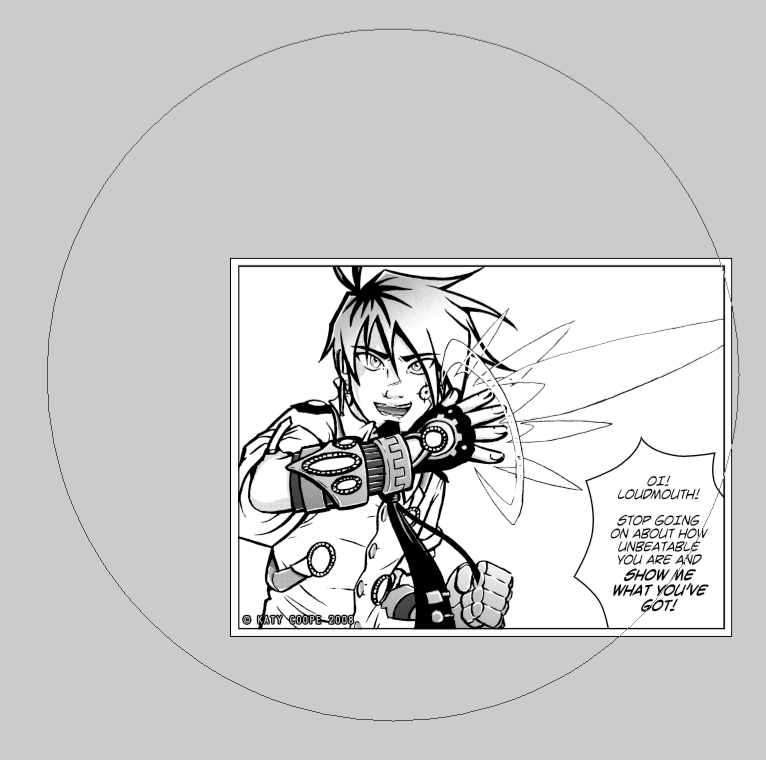
2) Grab the circle tool, set to path rather than shape. Hold option and shift then click on the focal point of your image and drag outwards to make a perfect circle. This circle will run through the centre of each of the speedline strokes, so make it nice and big or they'll protrude too far into your image.
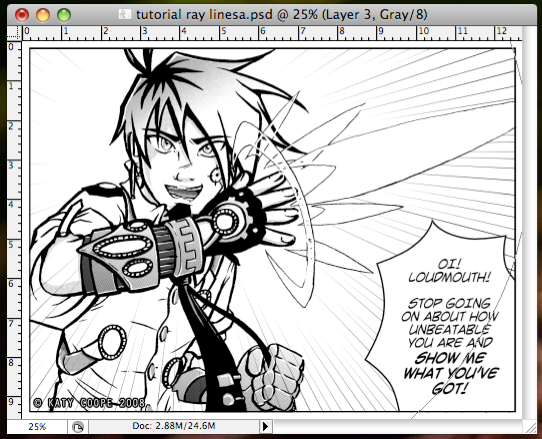
3) Now all you need to do is stroke the path as before, and you're done! Usually there'll be fewer lines in this kind of image.
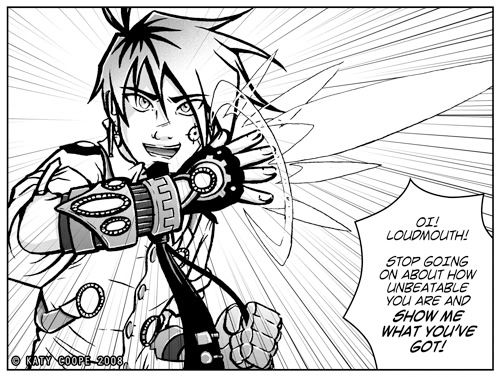
There are plenty of ways to modify this technique. You can double up layers to make some lines bolder, use the eraser to get rid of awkward looking lines, and adjust the presets on the fly to tailor your speedlines to your image. You can even try adding some in white, or creating your own hand drawn brushes instead of the vector triangles. Experimentation is the key and there are lots of different effects that you can create with this technique.
Good luck!
17 comments:
It doesnt seem to work right for me, I click path, make it then try to make the speedlines and it just stays the same angle, 0. Maybe because I have the wiindows version hmm
Make sure the 'Angle jitter' of the brush is set to 'direction'. I'm not sure what version of photoshop they put that option in but you'll need it for the brush to work correctly.
If I do that then they point every which way with no regard to the path I chose. They go left right, everywhere, and I have a very steady hand, especially when dragging down. I have CS3. The brush itself works fine, perfect motion lines but the direction is wonky.
If you use a directional one, you need to actually use the path tool and 'stroke' it. The easiest way is to select the path, then select the brush tool and hit enter. Even if you have a steady hand, it's going to jitter about if you try to do it by hand. Also, make sure that while the brush is set to direction, the slider is set to zero.
awe shoot, I didnt see the stroke path instructions, perhaps you should bold it or something, it seems to be easy to miss. Here I was trying to do it by hand. Silly me.
I was going over it again and suddenly I noticed it said stroke path, not brush path. Thanks for the quick reply. I was going to delete and say I figured it out but you beat me to it.
You're welcome. Hope you have fun with it!
oh yes, this is exactly what I need, I'm going to link to your tutorial in my webcomic on the next html update. www.drunkduck.com/Insanity_of_Xade if you want to take a look :)
hi im a big fan of ur drawings, i have one of ur books, how to draw more manga and i am slowly learning how to draw like that. i hope u come out with new books!
holy crap, I did not know this technique existed. Thank you so much for sharing!
Okay so How do you do Curved Speed Lines for a swirling view of motion?
That's a very good question. You could do it either by making a curved brush to use in the same way as the radial speedlines, or you could try using some photoshop's distort filters, like twirl (though you'll need to work on a much bigger canvas as twirl only effects a circle in the middle of the area you select.)
To twist linear speedlines, you could try using the warp tool as well.
Could you make some screen shots of your steps for focus speedlines? I'm french and it's not easy to understand and find tools and options in english..it would be very gentle and helpfull.You're the only one on the web who seems to know how to make focus speedlines in photoshop..and you are my last hope ! T3T ...
thanks a lot !
Orphee
I'm having trouble getting the radial lines in CS5. When I try to stroke after drawing the ellipse path, the lines are drawn around the path, but they are all vertical. Any ideas? Was there something I missed?
I'm having the same trouble as Dorian..I'm in CS5, and for the radial speedlines, I'm just getting a bunch of horizontal speedlines!
arrrrgh! haha i've spent 3 hours trying to get this right!
obviously it's a CS5 thing..this was a great tutorial otherwise though!
-johnny destructo
www.poptardsgo.com
I had a similar problem, but solved the issue. In the brush settings palette, go to brush tip shape and set the angle to 180. works fine once you do that.
Wow, this was very helpful, and it's quite a clever method! Thanks for sharing :)
Now I have no need to use plugin to do the speedlines! Thx Katy~!!!
Post a Comment